Wednesday, March 30, 2011

Reset forgotten Windows XP admin password: How to reset forgotten Windows administrator password?

Forgot windows password? Forget administrator password? No, problem. Windows will not angry, if you forgot administrator password of Windows. You can really reset, windows administrative password easily. This page contains information to reset windows administrator password. Just follow the steps and you will be able to reset Windows administrator password.

How to reset forgotten Windows administrator password?

Follow the following steps to reset forgotten Windows administrator password:

Step 1: Boot up your computer with Windows CD

  • Take a boot-able windows CD.
  • Insert the CD into your computer CD-ROM or DVD-ROM.
  • Boot your computer with that Windows CD like you are doing the same as the installation of Windows.
  • Within few seconds, you will see the message Press any key to boot from CD and press any key.

Step 2: Wait until the Repair window is prompted

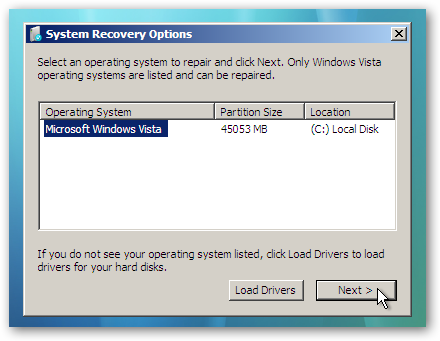
  • Wait until you see you are prompted from one of the two options: Install Windows or Repair Windows.

Step 3: Repair mode selection

  • Press R key of your keyboard and the setup will start copying files from the CD to computer hard drive.
  • Please wait for some time and don't do anything.
  • Windows will reboot automatically.

Step 4: Accessing to the command prompt

  • After restarting your computer, the Graphical User Interface screen of Windows will be shown.
  • Go to the command prompt by pressing the following key:
For Windows 2000 users:
  • You have to wait until you see the setup line like Registering Component.
  • When you see "Registering Component", press Shift+ F10 keys together of your computer keyboard.
  • After the following steps, you will access to the command prompt.

For Windows XP users:

  • You have to wait until you see the line like Installing devices.
  • When you see "Installing devices", press Shift+ F10 keys together of your computer keyboard.
  • After the following steps, you will access to the command prompt.
By following the above steps you can easily reset Windows administrator password. If you face any difficulties, you may ask in the comment section. Hope, you success.
© Written by rancidTaste

Step 5: Accessing the control panel

Now, you have to access control panel from the command prompt. You can access the command prompt by the following ways:

For windows 2000 users:
  • Type control.exe in the command prompt and hit Enter key.
For windows XP users:
  • Type nusrmgr.cpl in the command prompt and hit Enter key.

Step 6: Password resetting

  • After the above steps, you have access to the control panel. Now you can easily reset administrator password or set new password using the control panel administration/  password utilities.
  • When you have completed resetting the password, close the command prompt.
  • Wait unlit the repair is finished.
  • Restart your computer and now log in with the new password.

Tuesday, March 29, 2011

No Disk Error in Windows

The problem was reported by one of our readers who was facing this problem whenever he started the PC, an error message came up reading
There is no disk in the drive. Please insert a disk into drive” just as shown below

Cause of the problem

The problem can occur due to
•    Drive letter conflict
•    Temporary files created by Quick Time

Solution to the problem

Solution 1

1.    You need to change the drive letter for the inserted drive.
2.    To do this, Open Run, type “compmgmt.msc” and hit enter.
3.    Now click “Disk Management” on the left side.
4.    On the right side, right click on your Drive that appears in the disk management window and click change drive letter and paths.
5.    Assign a new letter which is not currently assigned to any other drive.

Solution 2

1.    Open QuickTime Player.
2.    From the File menu, choose Open Recent, and then choose Clear Menu. (You can read it here)

3.    Reboot may be required.

Difference between Format and Quick Format

When installing new copy of Windows you must have noticed following options:
•    Format the partition by using the NTFS file system (Quick)
•    Format the partition by using the FAT file system (Quick)
•    Format the partition by using the NTFS file system
•    Format the partition by using the FAT file system
•    Leave the current file system intact (no changes)

Why Microsoft has given two options of regular format and Quick Format when one is sufficient? If you do not know the difference between the two then here are the points.
Quick Format:
Quick format permanently removes the file from the disk but does not scan the partition for bad sectors. This option should be chosen if the drive has been scanned earlier and you are sure that the disk is not damaged.
Regular Format:
This format not only removes the files permanently but also scans the disk for bad sectors hence the time taken for this format is more than the Quick format. Use normal format to avoid future disk errors in the drive.

Steps to do at Windows was Unable to Complete the Format problem

I wonder what is going with my PC right now but the truth is that my system is displaying this error messageWindows was unable to complete the format” every alternate time when I try to format my USB Pen drive. It is certainly a PC problem as this is happening with all drives i have.

This is a strange problem I have started facing recently and what it does is:
•    Doesn’t format the drive once every two tries.
•    Renames the drive to “Removable disk” thereby removing our set names.
Why this problem occurs:
•    Formatting a drive not only means removing all the data but it also allocates a new File system to the drive. So if the drive is already in FAT system (say) then again allocating it the same system may cause this error.
•    There are full chances of this problem being caused due to changes made by some virus in the system.
What to do:
While the solution to this problem is still unknown to me, but this is what you can do while formatting the drive.
1.    Format the drive to some other file system first like NTFS and then format it to the FAT system.
2.    As in my case, formatting the drive second time didn’t result in any conflict, so you can format the drive one more time to see what happens.
3.    You may format the drive from the “Disk Management” tool. Run diskmgmt.msc in the run box and format the drive from there.

Sunday, March 27, 2011

Firefox 4 Released: Steps to Follow

By now you must have known that Mozilla had released the latest version of the browser Firefox 4. Below are the major changes that Mozilla had incorporated in the browser.

•    Tabs on top
•    Add-on manager
•    Menu tab
•    App tab
•    Private browsing
•    Password manager
•    Customizations
•    Synchronization
Steps for clean install:
Now if you have decided to switch to the new version of the browser then you should have a look at the following things that you should do.
Backup the bookmarks
To backup your bookmarks completely, use the Mozilla Backup tool called MozBackup. Use the version as in the link as it will serve you better with the Firefox 4.
Uninstall/install Firefox
You may either completely remove the earlier version of the Firefox before installing this new version or just update the older version.
Restore bookmarks
After the successful installation of the browser, it is time to restore the bookmarks that we have just backed up. You can use the same tool MozBackup again, for this purpose.
Download Firefox 4

Wednesday, March 23, 2011

How To Install Windows 7/Vista From USB Drive [Detailed 100% Working Guide]

The method is very simple and you can use without any hassles. Needless to say that your motherboard should support USB Boot feature to make use of the bootable USB drive.
Requirements:
*USB Flash Drive (Minimum 4GB)
*Windows 7 or Vista installation files.
Follow the below steps to create bootable Windows 7/Vista USB drive using which you can install Windows 7/Vista easily.
1. Plug-in your USB flash drive to USB port and move all the contents from USB drive to a safe location on your system.
2. Open Command Prompt with admin rights. Use any of the below methods to open Command Prompt with admin rights.
*Type cmd in Start menu search box and hit Ctrl+ Shift+ Enter.
Or
*Go to Start menu > All programs > Accessories, right click on Command Prompt and select Run as administrator.
3. You need to know about the USB drive a little bit. Type in the following commands in the command prompt:
First type DISKPART and hit enter to see the below message.
Bootable USB Drive
Next type LIST DISK command and note down the Disk number (ex: Disk 1) of your USB flash drive. In the below screenshot my Flash Drive Disk no is Disk 1.
4. Next type all the below commands one by one. Here I assume that your disk drive no is “Disk 1”.If you have Disk 2 as your USB flash drive then use Disk 2.Refer the above step to confirm it.
So below are the commands you need to type and execute one by one:
SELECT DISK 1
CLEAN
CREATE PARTITION PRIMARY
SELECT PARTITION 1
ACTIVE
FORMAT FS=NTFS
(Format process may take few seconds)
ASSIGN
EXIT
Don’t close the command prompt as we need to execute one more command at the next step. Just minimize it.
Bootable USB Drive
5. Next insert your Windows7/Vista DVD into the optical drive and check the drive letter of the DVD drive. In this guide I will assume that your DVD drive letter is “D” and USB drive letter is “H” (open my computer to know about it).
6. Maximize the minimized Command Prompt in the 4th step.Type  the following command now:
D: CD BOOT and hit enter.Where “D” is your DVD drive letter.
CD BOOT and hit enter to see the below message.
7. Type another command given below to update the USB drive with BOOTMGR compatible code.
BOOTSECT.EXE /NT60 H:
14
Where “H” is your USB drive letter. Once you enter the above command you will see the below message.
8. Copy your Windows 7/Vista DVD contents to the USB flash drive.
9. Your USB drive is ready to boot and install Windows 7/Vista. Only thing you need to change the boot priority at the BIOS to USB from the HDD or CD ROM drive. I won’t explain it as it’s just the matter the changing the boot priority or enabling the USB boot option in the BIOS.

Monday, March 21, 2011

Solution to ‘You may be a victim of software counterfeiting’ Problem

Microsoft has started bugging the users of non genuine copies of Windows. If you are also running a non genuine or pirated copy of Windows then there is a full chance of you getting this notification one day or the other.

The problem was reported by one of our viewers that when she updated her copy of Windows with Windows Update then her system started showing this notification that reads “You may be a victim of software counterfeiting” and “This copy of windows does not pass genuine Windows validation”.

These notifications start coming back again after some time and do not feel good. Though I never encourage piracy but here is how you can remove this problem:
1.    Before doing anything serious try restoring your system. If the problem is occurring after the Windows Update then System Restore will surely help.
2.    But if it does not then do try this, launch Windows Task Manager.
3.    Locate the process “wgatray.exe” and end it.
4.    Log in into the Safe Mode and delete the file WgaTray.exe from c:\Windows\System32
5.    Also delete the WgaTray.exe from c:\Windows\System32\dllcache
6.    Type regedit in Run to open Registry Editor, navigate to HKEY_LOCAL_MACHINE\SOFTWARE\Microsoft\Windows NT\CurrentVersion\Winlogon\Notify key.
7.    Delete the folder WgaLogon and all of its contents.
8.    Restart the PC normally.
Update:
Download this WGA remover tool called RemoveWGA.exe, just download it and run.
Download WGA Remover 2010 for Windows 7

Thursday, March 10, 2011

Fixing "BOOTMGR is missing" Boot Windows 7 or Vista

If your Windows 7 or Vista computer has encountered the dreaded “BOOTMGR is missing” error, you aren’t alone. If the problem isn’t hardware related you can fix it with relative ease as long as you have a Windows DVD handy.
If you don’t have one, you can create a Windows Vista repair disk using our guide.
image
Boot off the Windows Vista DVD and then click Next at the first prompt:
image
You should see a link in the lower left-hand side for “Repair your computer”
image
The installation process will attempt to find your Vista installation directory. If there’s more than one in the list, select the correct one and then use the Next button again.
image
Click the first link for “Startup Repair”
image
The installation process will repair the system, and then prompt for you to reboot.
image
Alternatively you could have chosen the Command Prompt option instead, and use the following command to fix the boot options only:
bootrec /fixboot
image
At this point you should be able to reboot your computer, remove the DVD and everything should be working.

Tuesday, March 1, 2011

Break or Reset Administrator password in XP

So if you have forgotten the password of your admin account in Windows XP or just want to break in the Admin account of your college or office, do not worry, you can easily do that. However, I recommend this trick only for your personal use. There are numerous ways available to do so but the best possible way is to use EBCD (Emergency Boot CD), download from here.
Procedure:
1.    After you have downloaded the EBCD, extract and run “makeebcd.exe” to create an iso image for burning on the disk.
2.    Set Bios to boot from the CD Drive and insert the CD created in above step. You will see the following image, type 5 to select NT password for editor (Linux-based).
3.    Then press Enter in the next step to proceed.
4.    Press Enter again if you don’t keep Windows on SCSI drive.
5.    Select which drive contains your installation files or just press Enter to accept the default value given in the bracket. If your installation is in C: drive just press Enter.
6.    Press Enter in the next step to accept default values.
7.    Press Enter again.
8.    To enter password, press Enter to select the default option.
9.    Select the username. To enter password for Administrator just press Enter.
10.    To change the password just leave it blank and change it later after login (modifying password at this step will not work).
11.    Press Enter to confirm.
12.    Type ‘!’ and press Enter in the next step.
13.    Type ‘q’ to quit.
14.    Type ‘Y’ to write the SAM files.
Congratulations the password has been reset. So just login with no password and enter yours.

How to remove Security Tool Virus / Malware ( Removal Guide )

Security Tool is a self-proclaimed anti-spyware program, promoted through pop-ups, trojans and malware webites. The Security Tool is promoted just like Windows Police Pro or Green AV ( Antivirus ) 2009. The rogue anti-spyware programs are distributed through websites that simulate virus scans, then the user is told to download the software to clean his PC.
Once installed, the Security Tool will start automatically each time you turn on your PC and log in to Windows. Then it will start scanning your computer and show you a list of fake infections. When you try to clean the infected files, you are prompted to buy the software.
Be careful, don’t believe anything this rogue software prompts to you and DO NOT delete the infected files found by it, because those are just legitimate files.

This is how Security Tool looks ( article continues below the image ):
Security Tool Virus
Security Tool Virus
To get rid of this software, you need MalwareBytes Anti-Malware, a legitimate software that will get you rid of all those rogue applications and malware, and rkill.

 How to remove Security Tool:
  • Download MalwareBytes Anti-Malware.
  • Download rkill.com ( rkill.exe ).
  • Install the mbam-setup.exe file.
  • To install it, just press next and don’t edit any options if you are not sure what you’re doing.
  • After the installation is ready, MalwareBytes Anti Malware will start automatically and will require you to update the software, so just press OK.
  • Go to the Scan tab, select “Perform Quick Scan” and press “Scan.”
  • MalwareBytes Anti Malware will now scan all your PC for malware, including the Security Tool.
  • You will see a “The Scan completed successfully. Click ‘Show Results’ to display all objects found” prompt once the scan is finished. Press OK.
  • Now press “Show Results.”
  • You will see a list of malware applications, including the Rogue.SecurityTool. Be sure to select them all and press “Remove Selected.”
  • After MalwareBytes Anti Malware finishes the cleaning, you can close the program and be sure your PC is clean.
  • As a caution, you should also use rkill.com ( rkill.exe ) to terminate malicious processes